

Five Bikepacking Tips for a Great Adventure
It makes complete sense to want to make the most of our time outside when conditions are good. Why turn around half way through the day? The great thing about bikepacking is how liberating it is. The distance you can cover, and places you can explore are instantly opened up to far beyond where your legs can carry you during the course of a single day. In this piece, Tom Hill offers us a practical guide for how to prepare, and enjoy, your bikepacking adventures.
Words and photos by Tom Hill
There is a lot kit associated with bikepacking. Some of it is pretty much fundamental (you WILL need a bike), some gear will simply make the experience a little more comfortable/easier. This post takes your through five areas to ponder. I won’t tell you what to bring – there isn’t a right answer – but will give you enough information to help make your own choices. You will still make mistakes. I still do, it’s all part of the learning process, but these tips should mean you are safe and relatively comfortable while you do learn.
One – Luggage
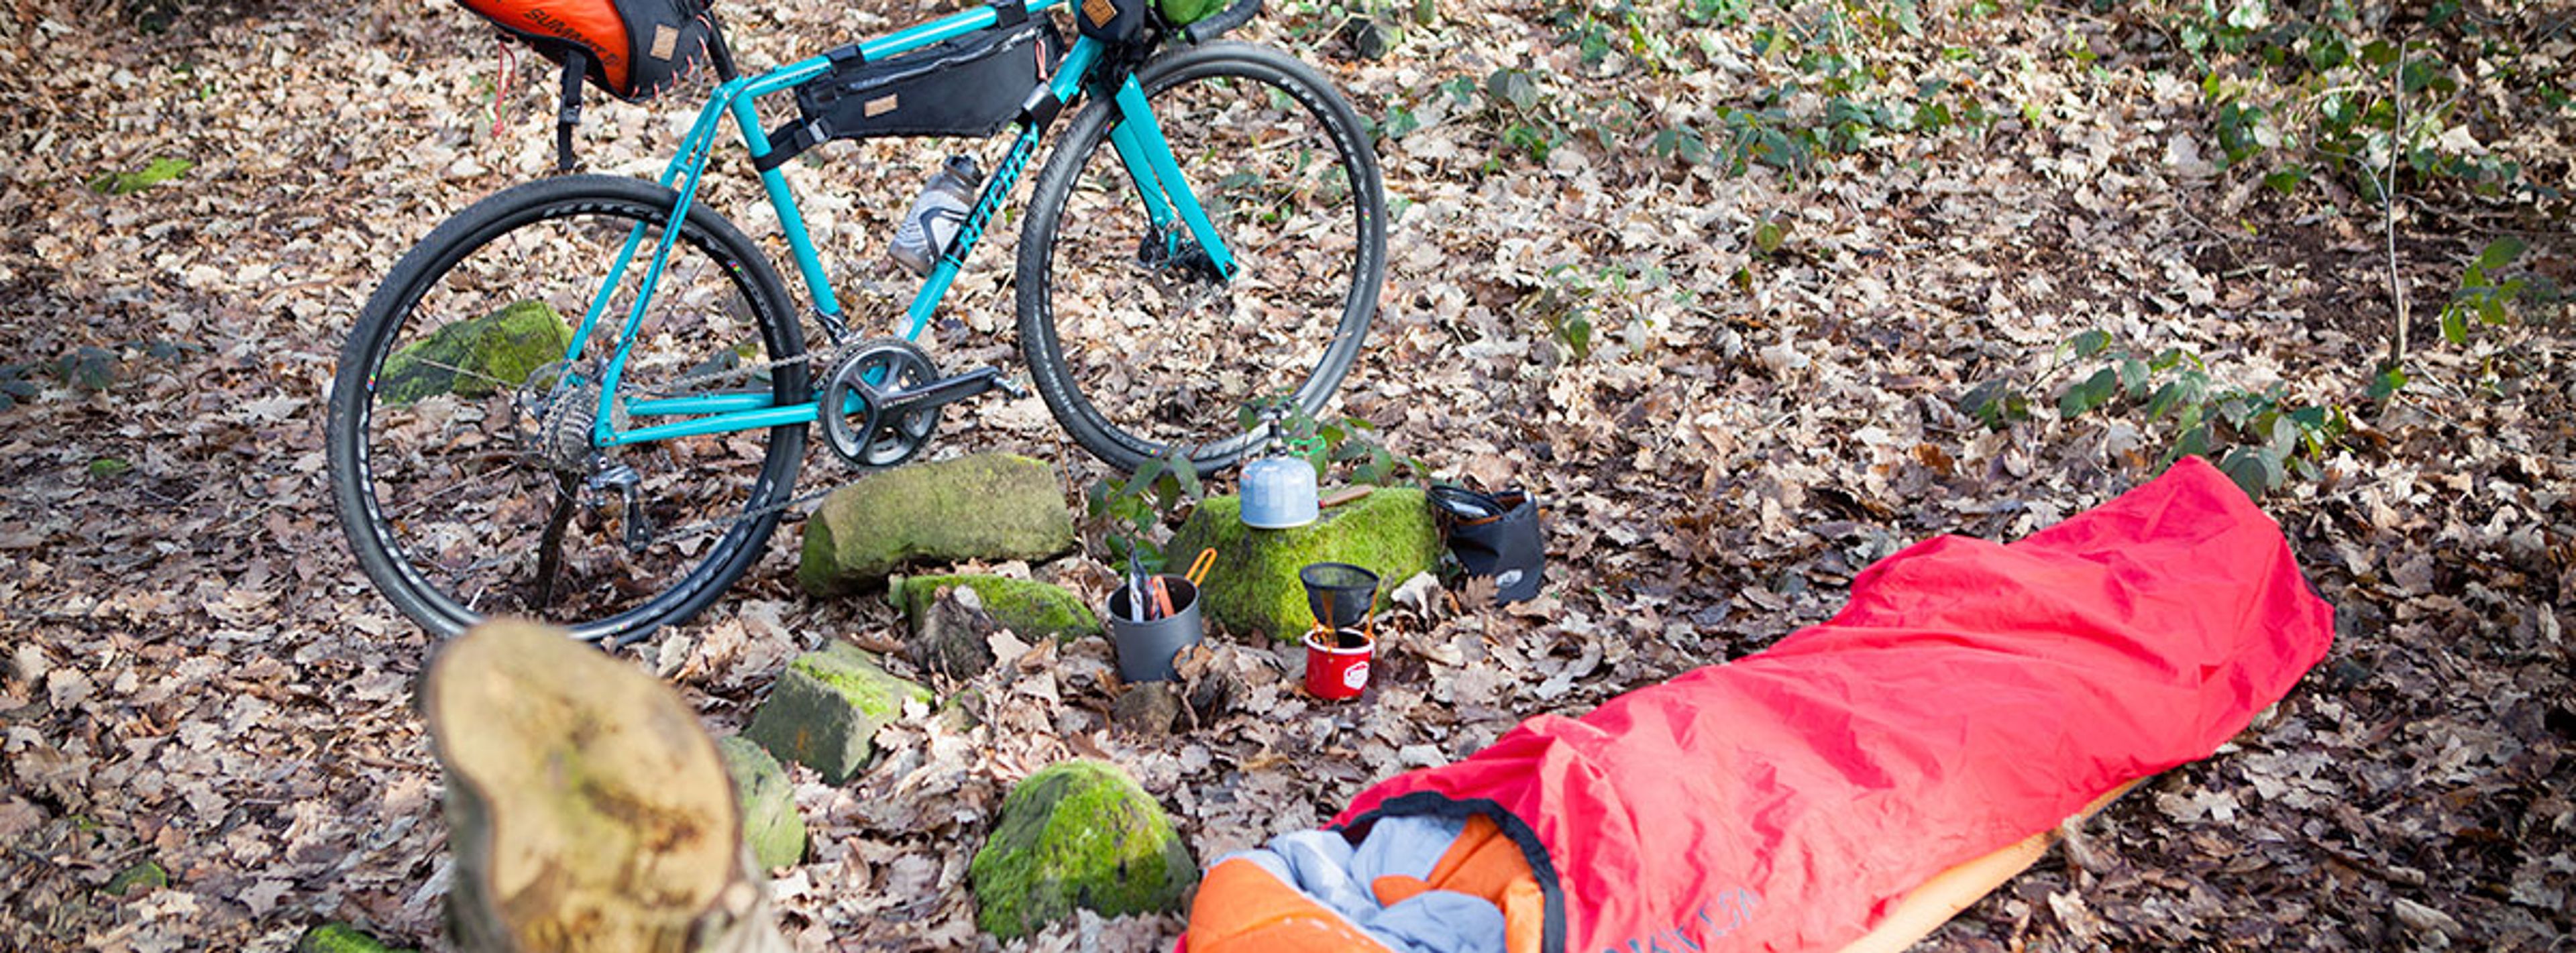
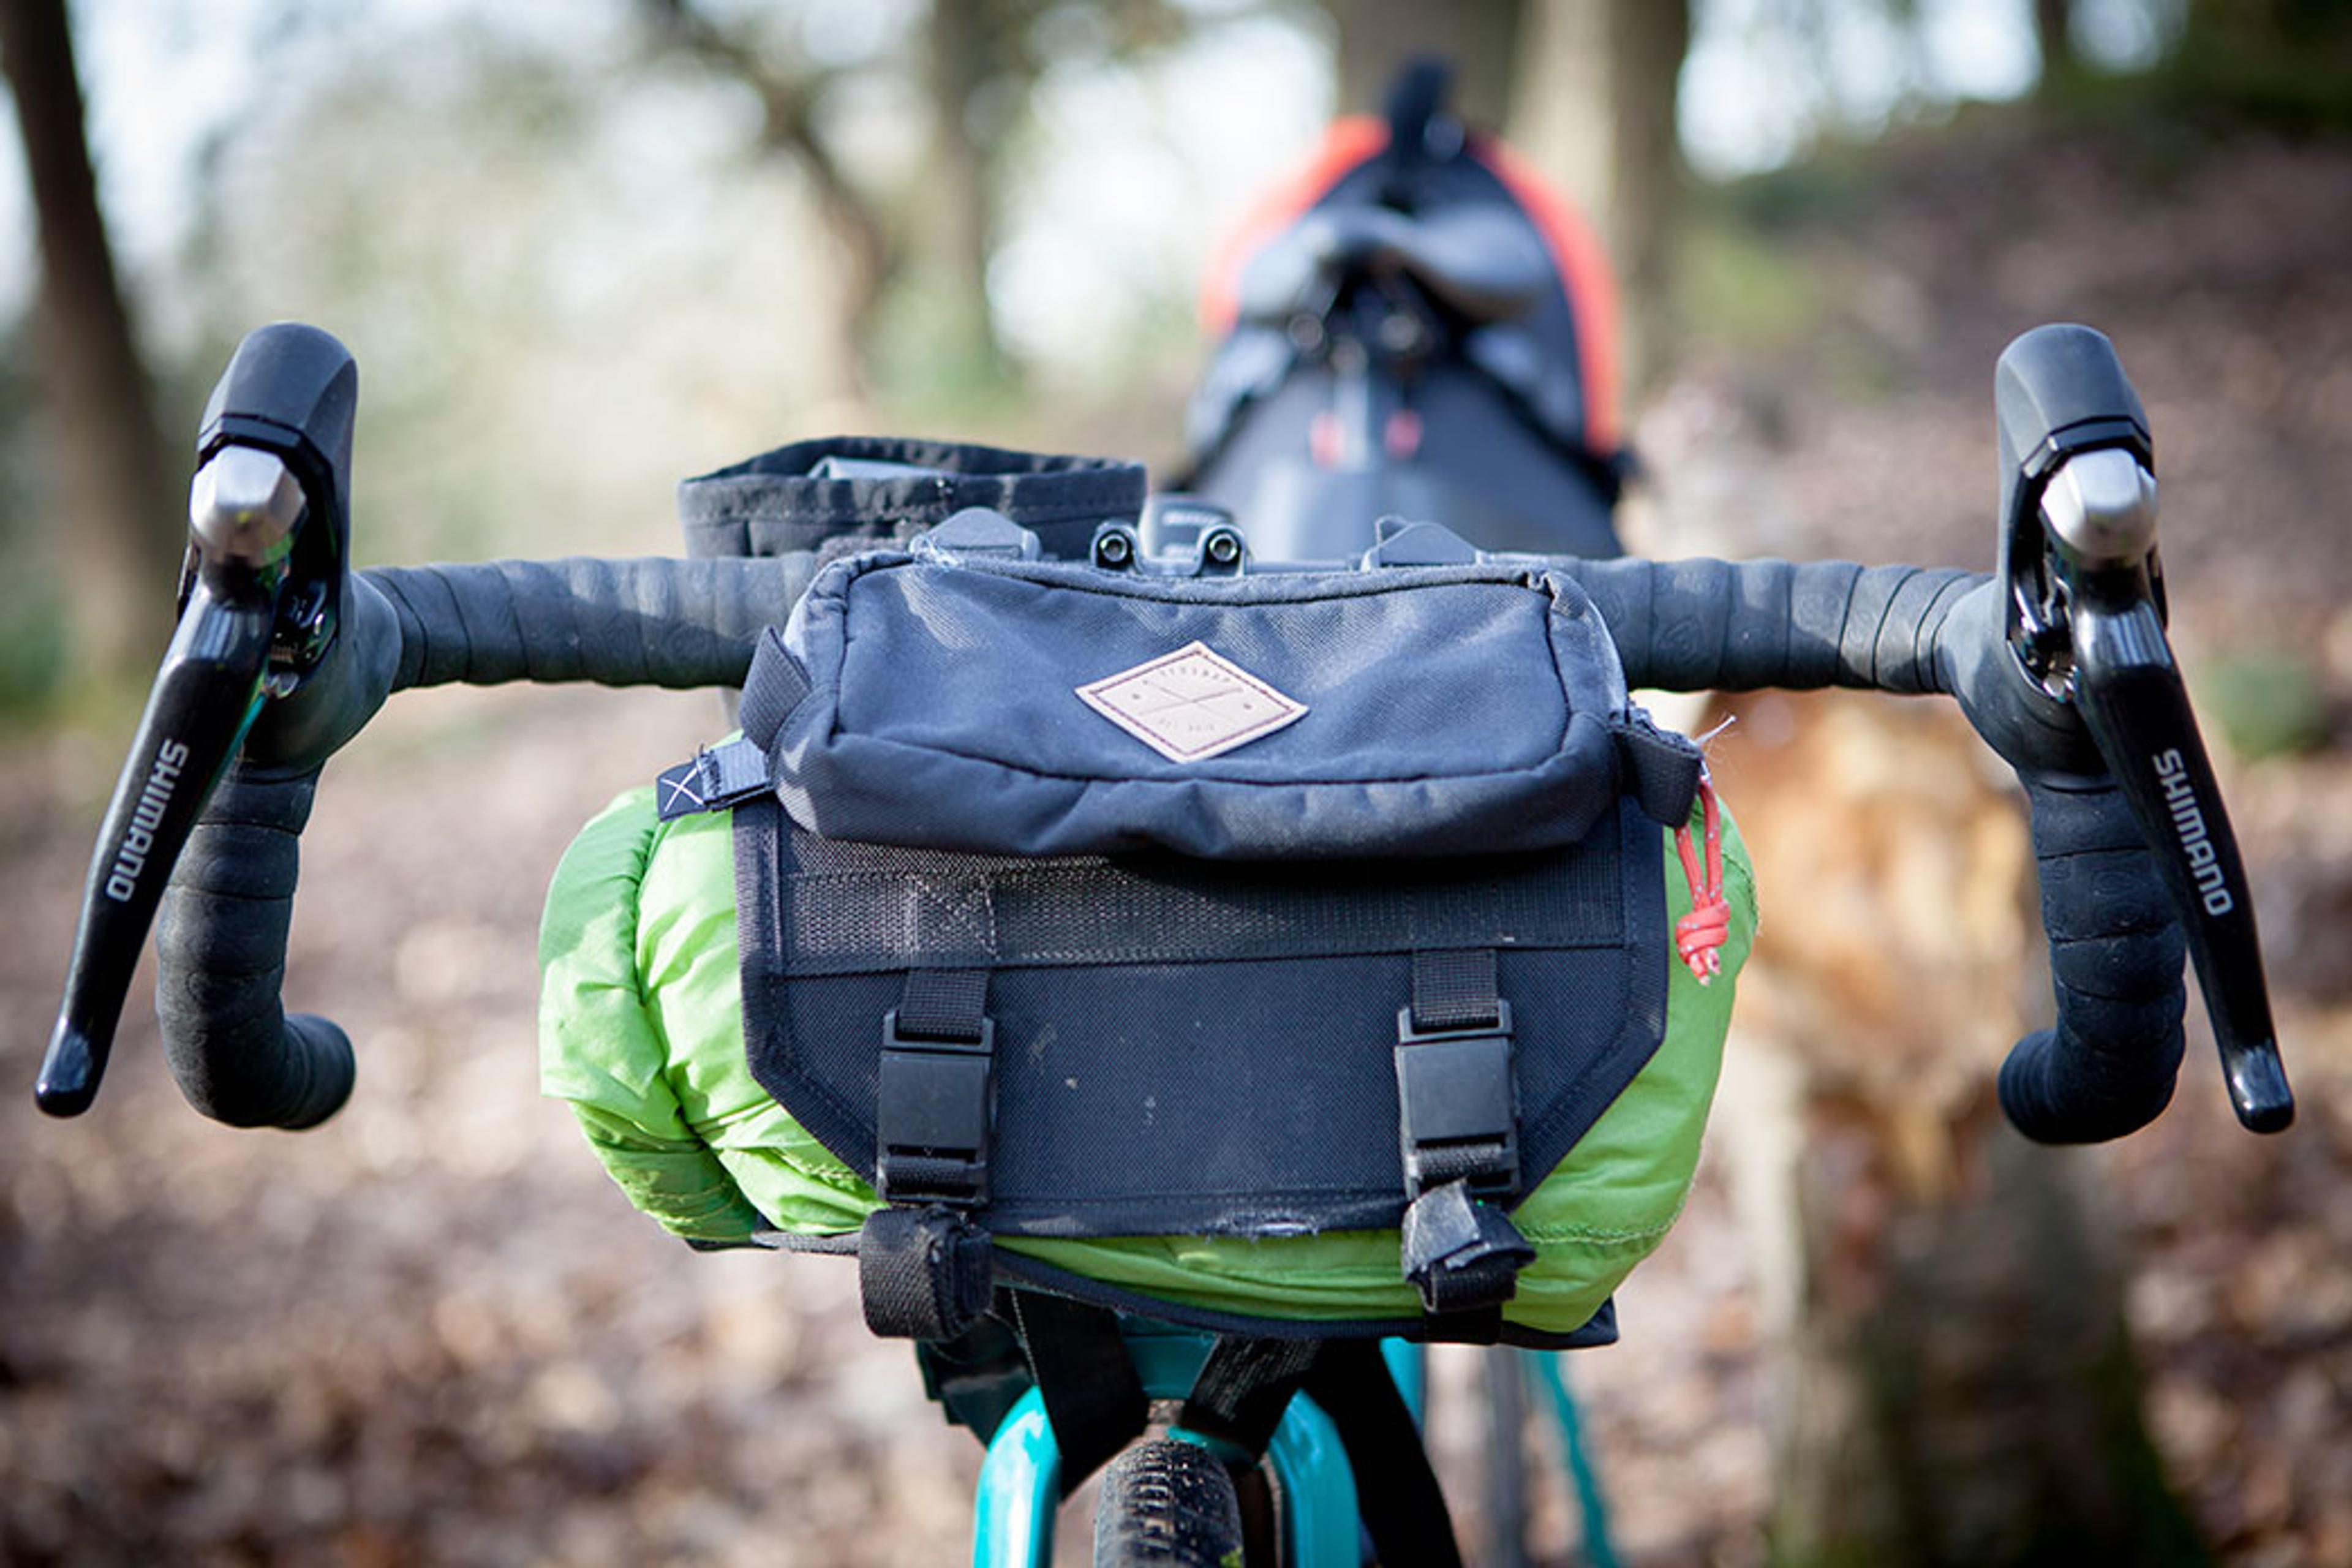
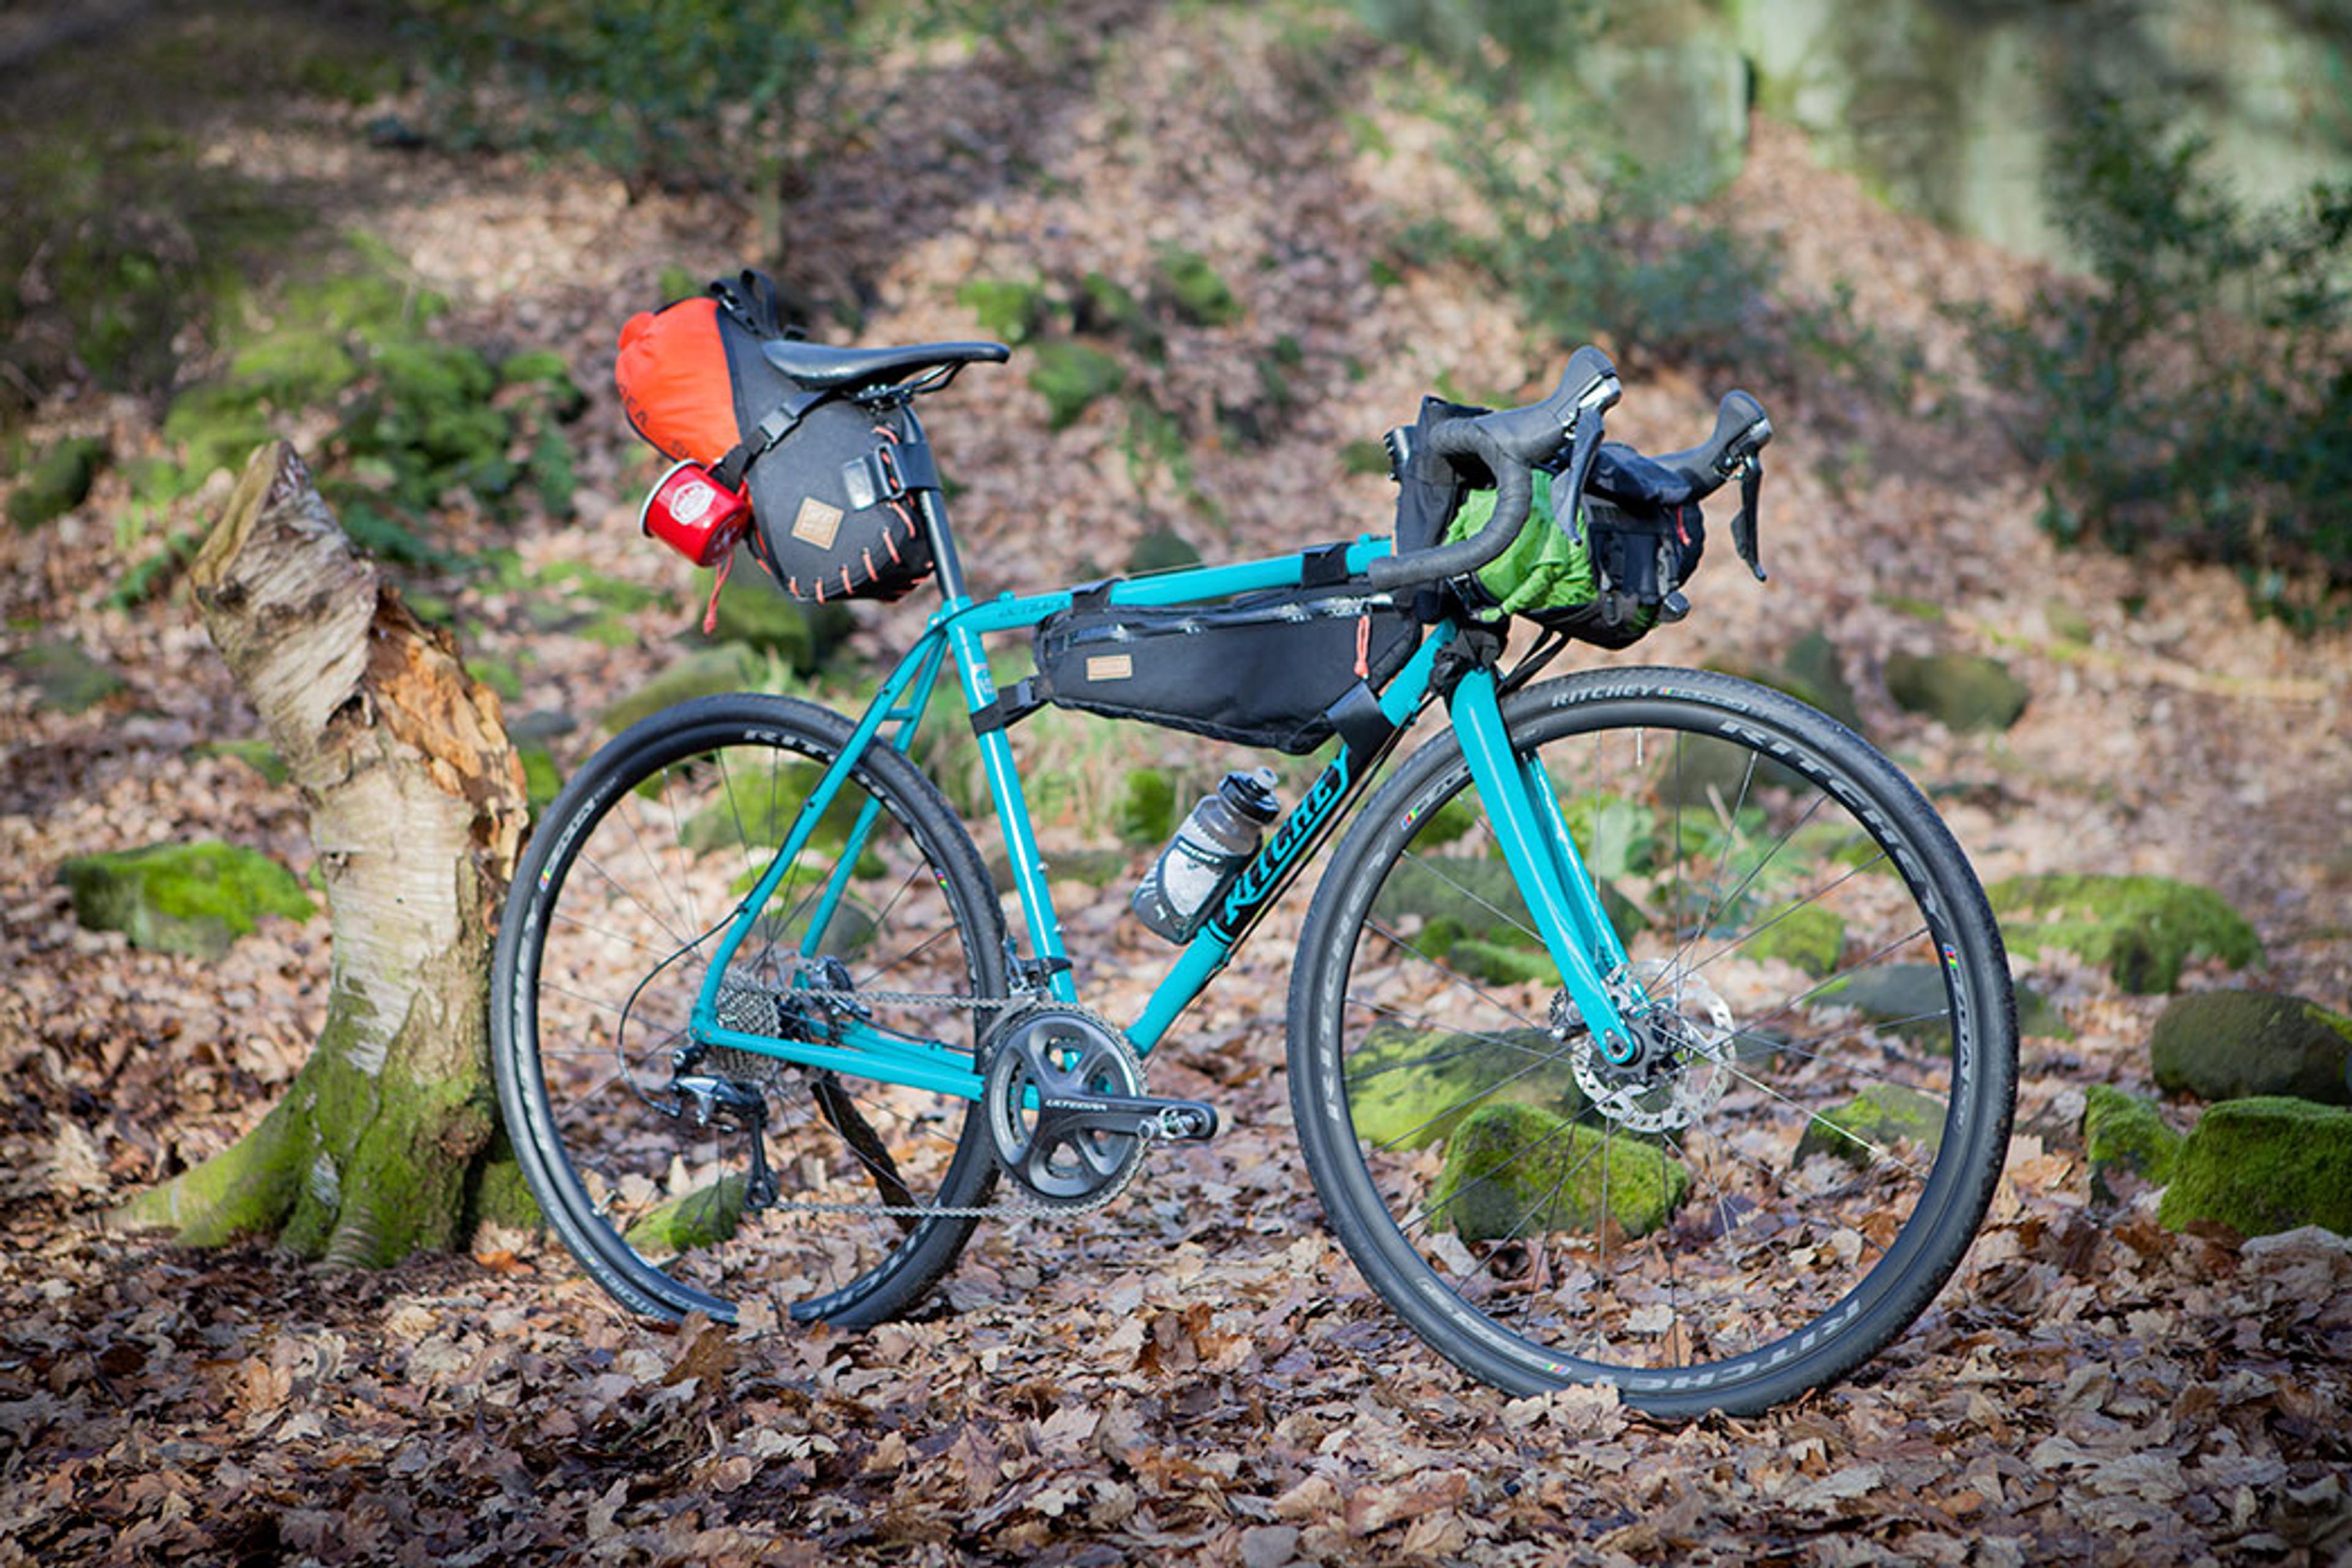
Okay, so you’ve decided you fancy heading off into the wilderness for a night or two. It’s an obvious point, but you’ll be bringing more stuff with you than you might for a typical day ride. How are you going to carry it? You could load everything into a rucksack and crack on. It’s how I started, and has the benefit of being cheap. The downside is that all that extra weight is sitting on your back and shoulders, and you have more weight on the saddle. It’s not comfortable after a few hours of riding. Panniers have long been the mainstay of road-touring and still have their place, but rough off-road terrain is not it. They rattle and get snagged on rocks and flora – no fun. Over the last decade or so, specific bikepacking luggage has really taken off. Typically, these are soft bags which attach directly to the frame. A typical set-up will include a bar-roll, frame bag and saddle bag. These will often be complemented with smaller bags on the bars or top-tube with easy access on the move.

There are a multitude of manufacturers out there now, from cottage industry small-batch makers through to the big players. Each have their own quirks and design features, but all follow these basic design principles. The set-up in these photos is courtesy of Restrap, but Apidura, Wildcat, Revelate and Ortlieb amongst many others offer similar products.
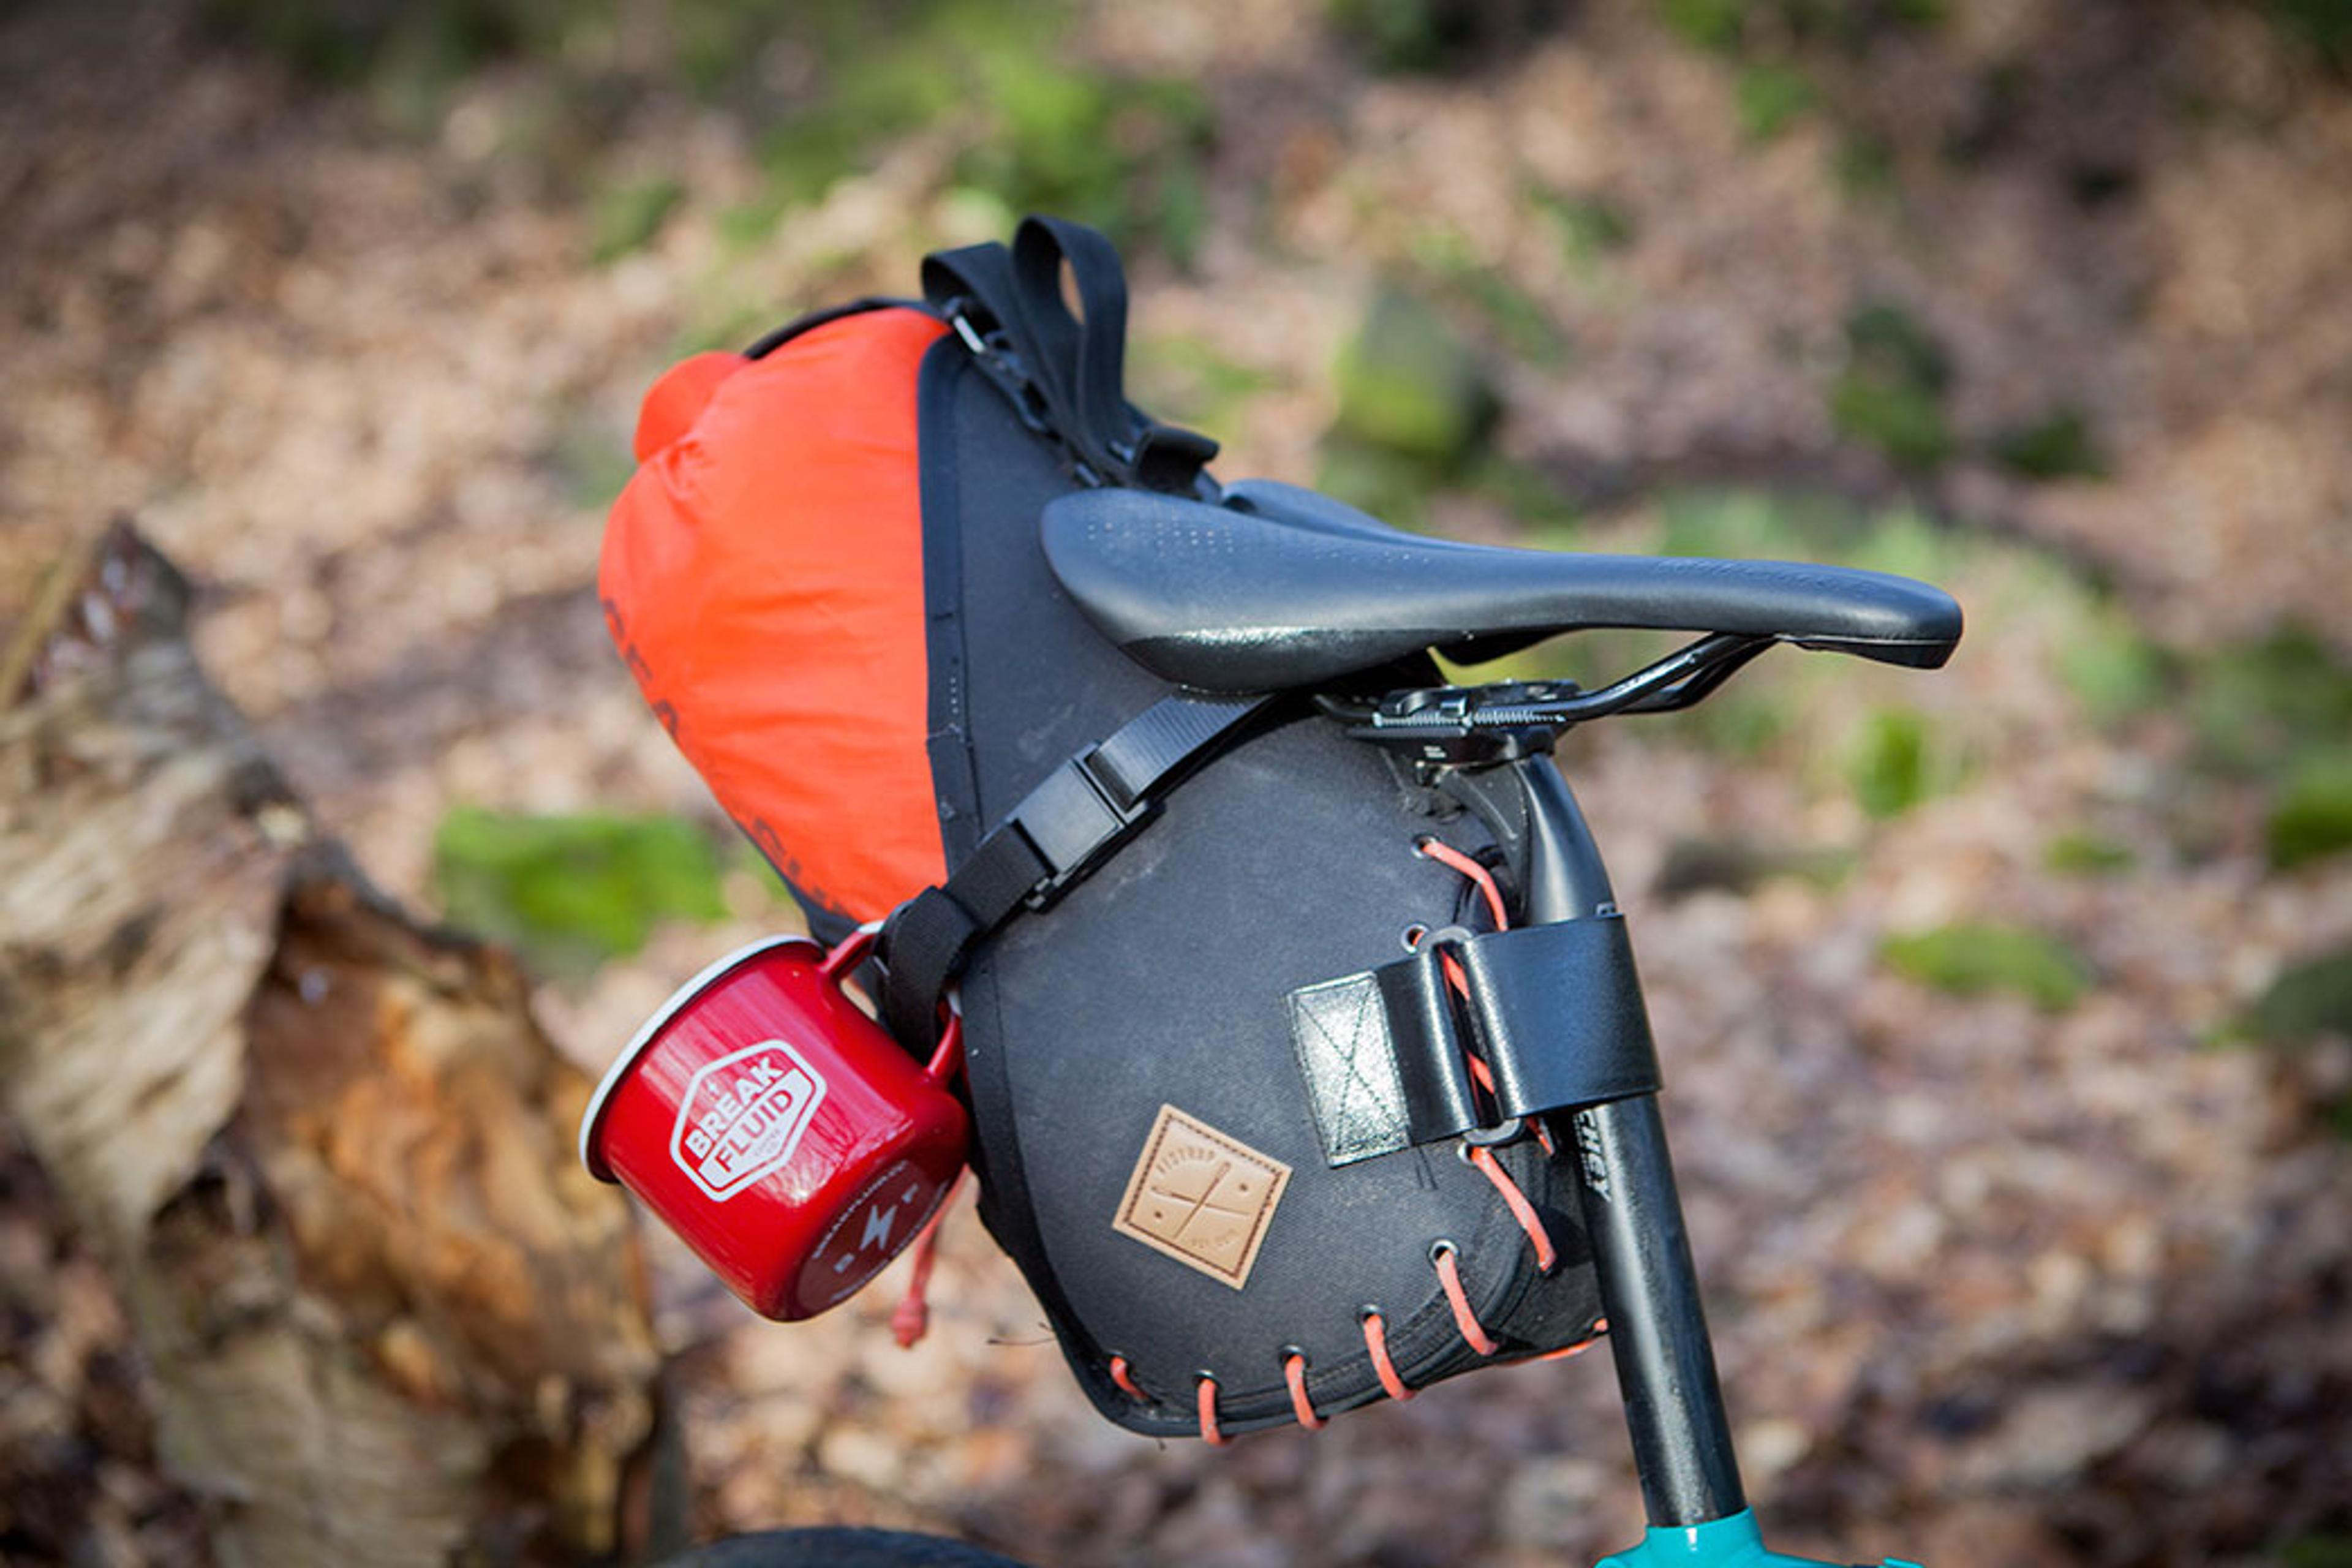
I’m a fan of the “holster” style approach that Restrap use for their saddle bag and bar bag. Rather than attaching a bag to the bars, you fit harnesses, which then strap down a drybag. This sounds like minor thing, but it allows you to quickly remove the drybag when you arrive at your destination without fiddling with a multitude of straps. I’ve been even more thankful of this approach when leaving the next morning, in sub-zero conditions and numb fingers. Efficiency is king, and it’s amazing how small timesavers make your whole experience more pleasurable.
Two – Your sleep system
Now you can carry a load of stuff on your bike, what should you fill these bags with? There’s a running theme through the next few bullet points. There is a real dichotomy between comfort when you get to your destination and the desire for a lightweight approach (minimising discomfort and extra effort on the bike). It’s also fair to say that there isn’t a single perfect sleep system for every person in every scenario. I prefer to go with some flexibility and choice, based on weather, how many nights I’ll be out for, whether I’m willing to sacrifice some comfort for speed.
Let’s break things down a little more, though:
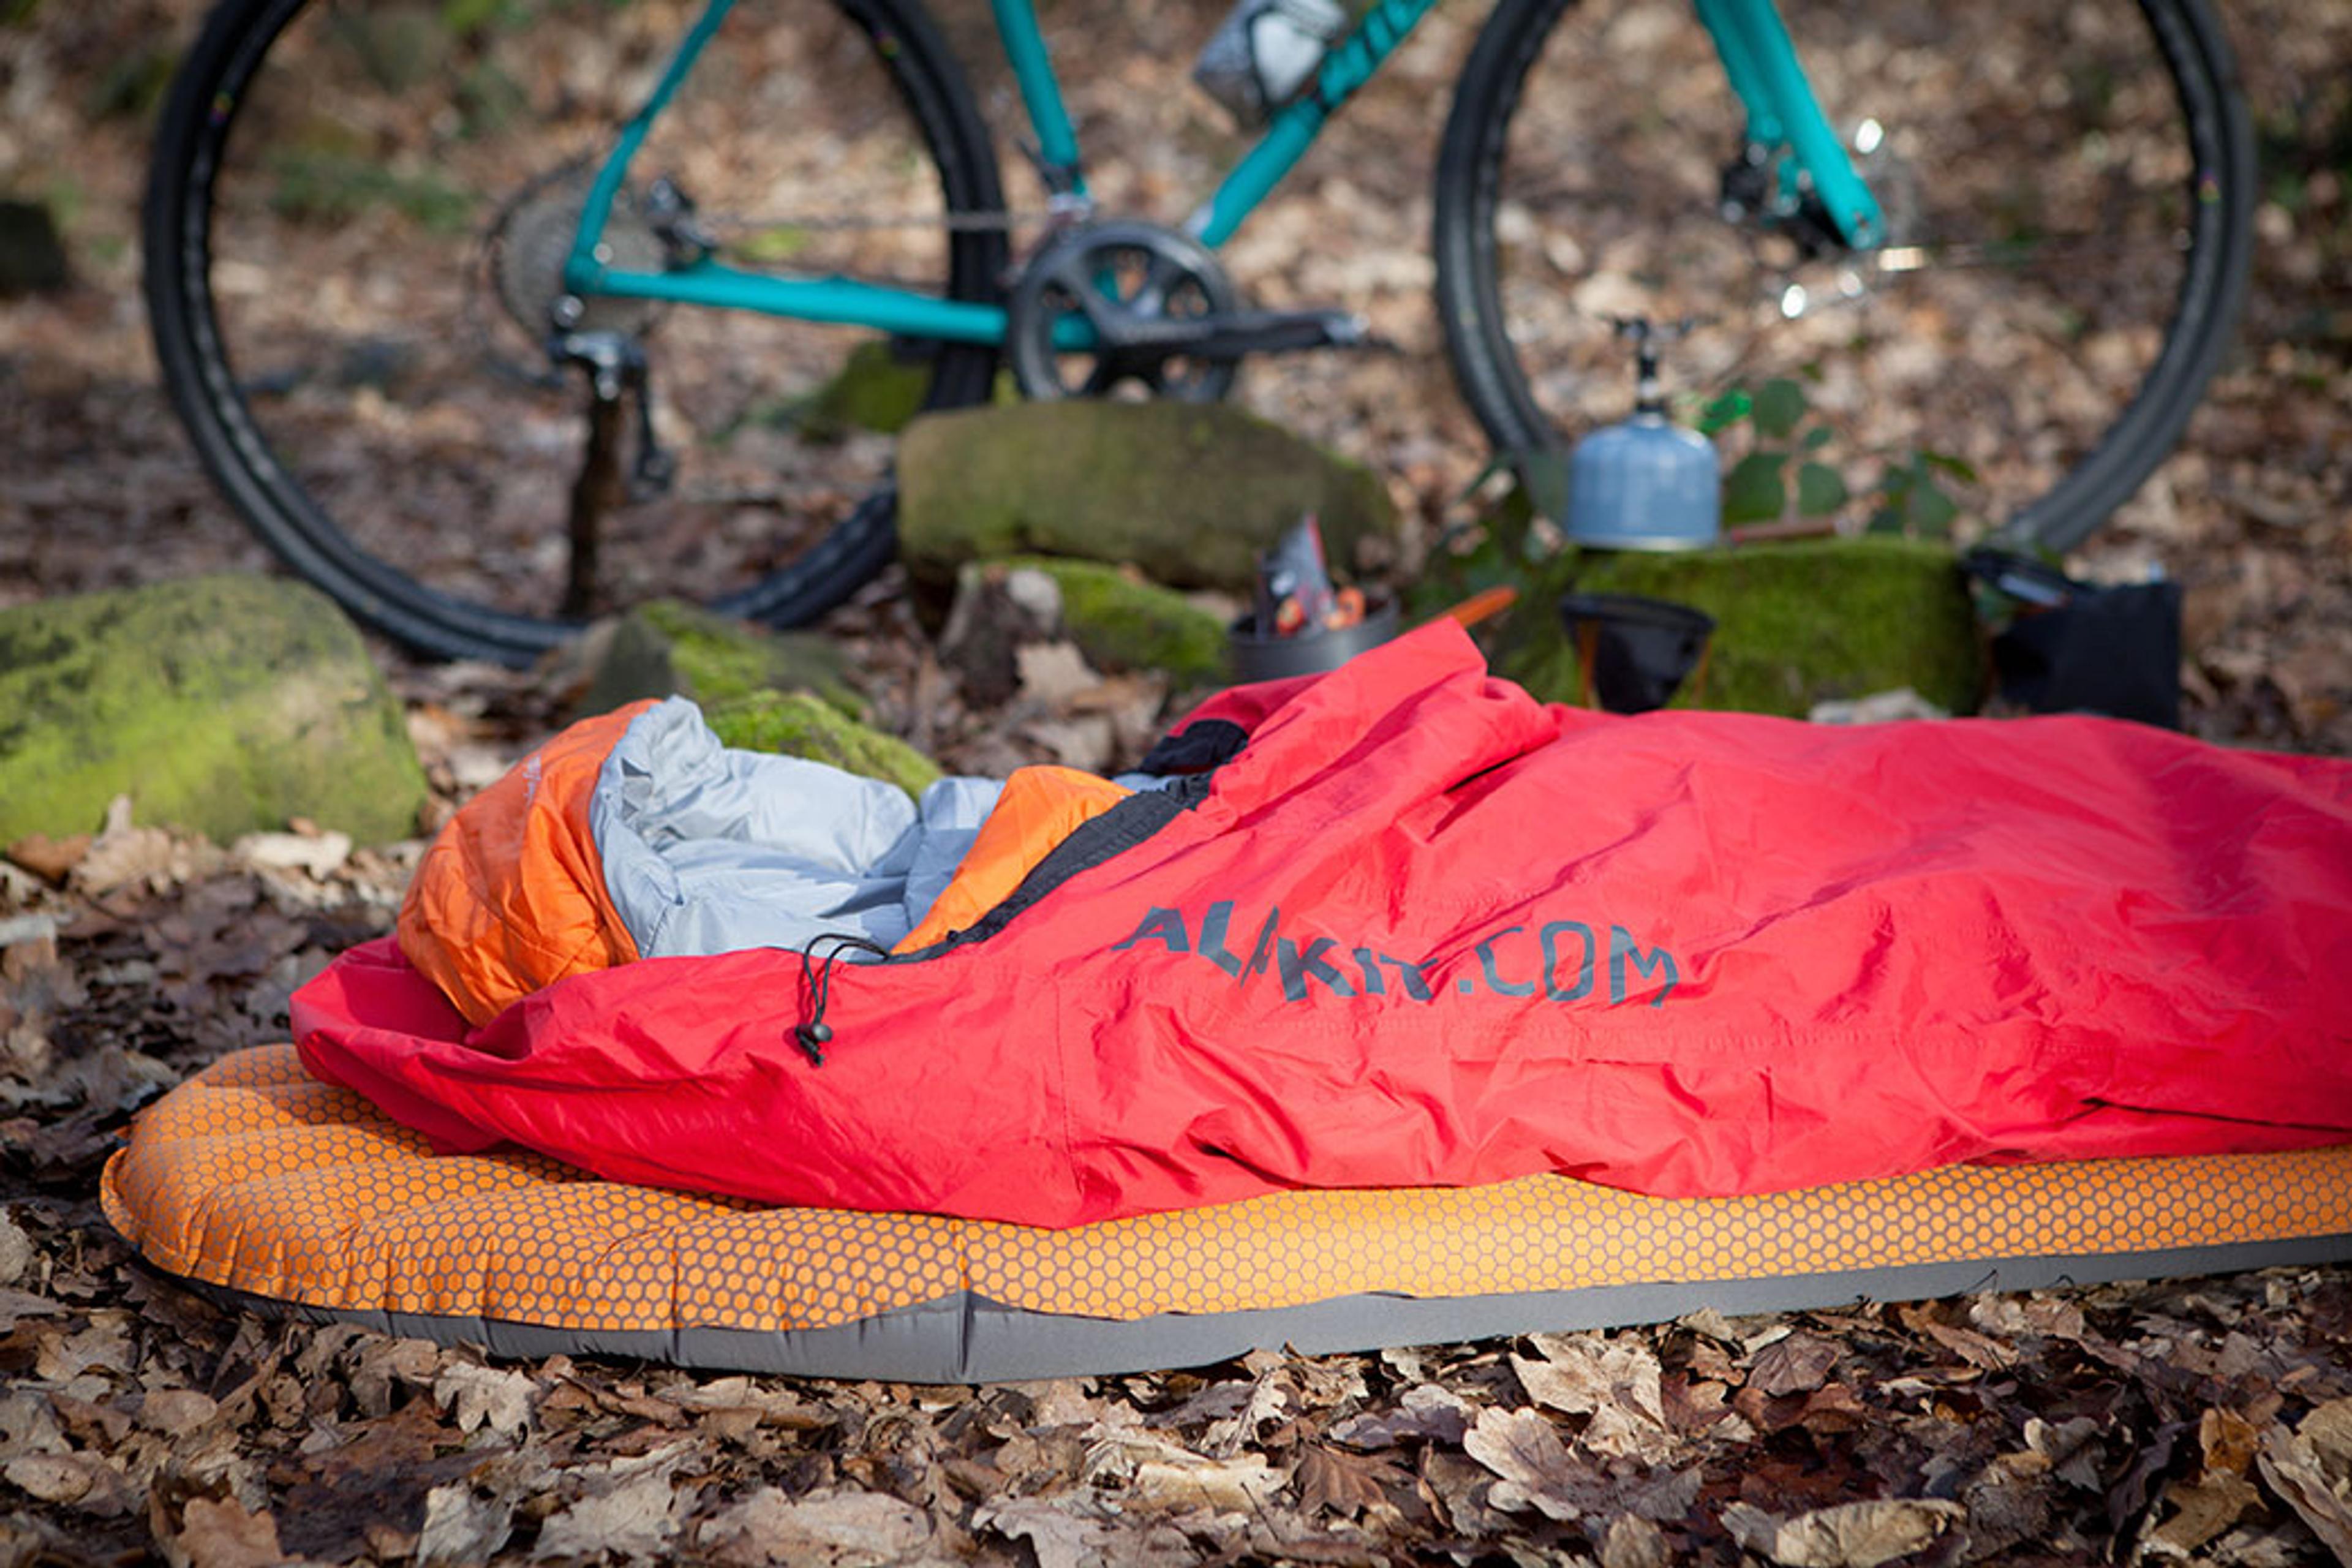
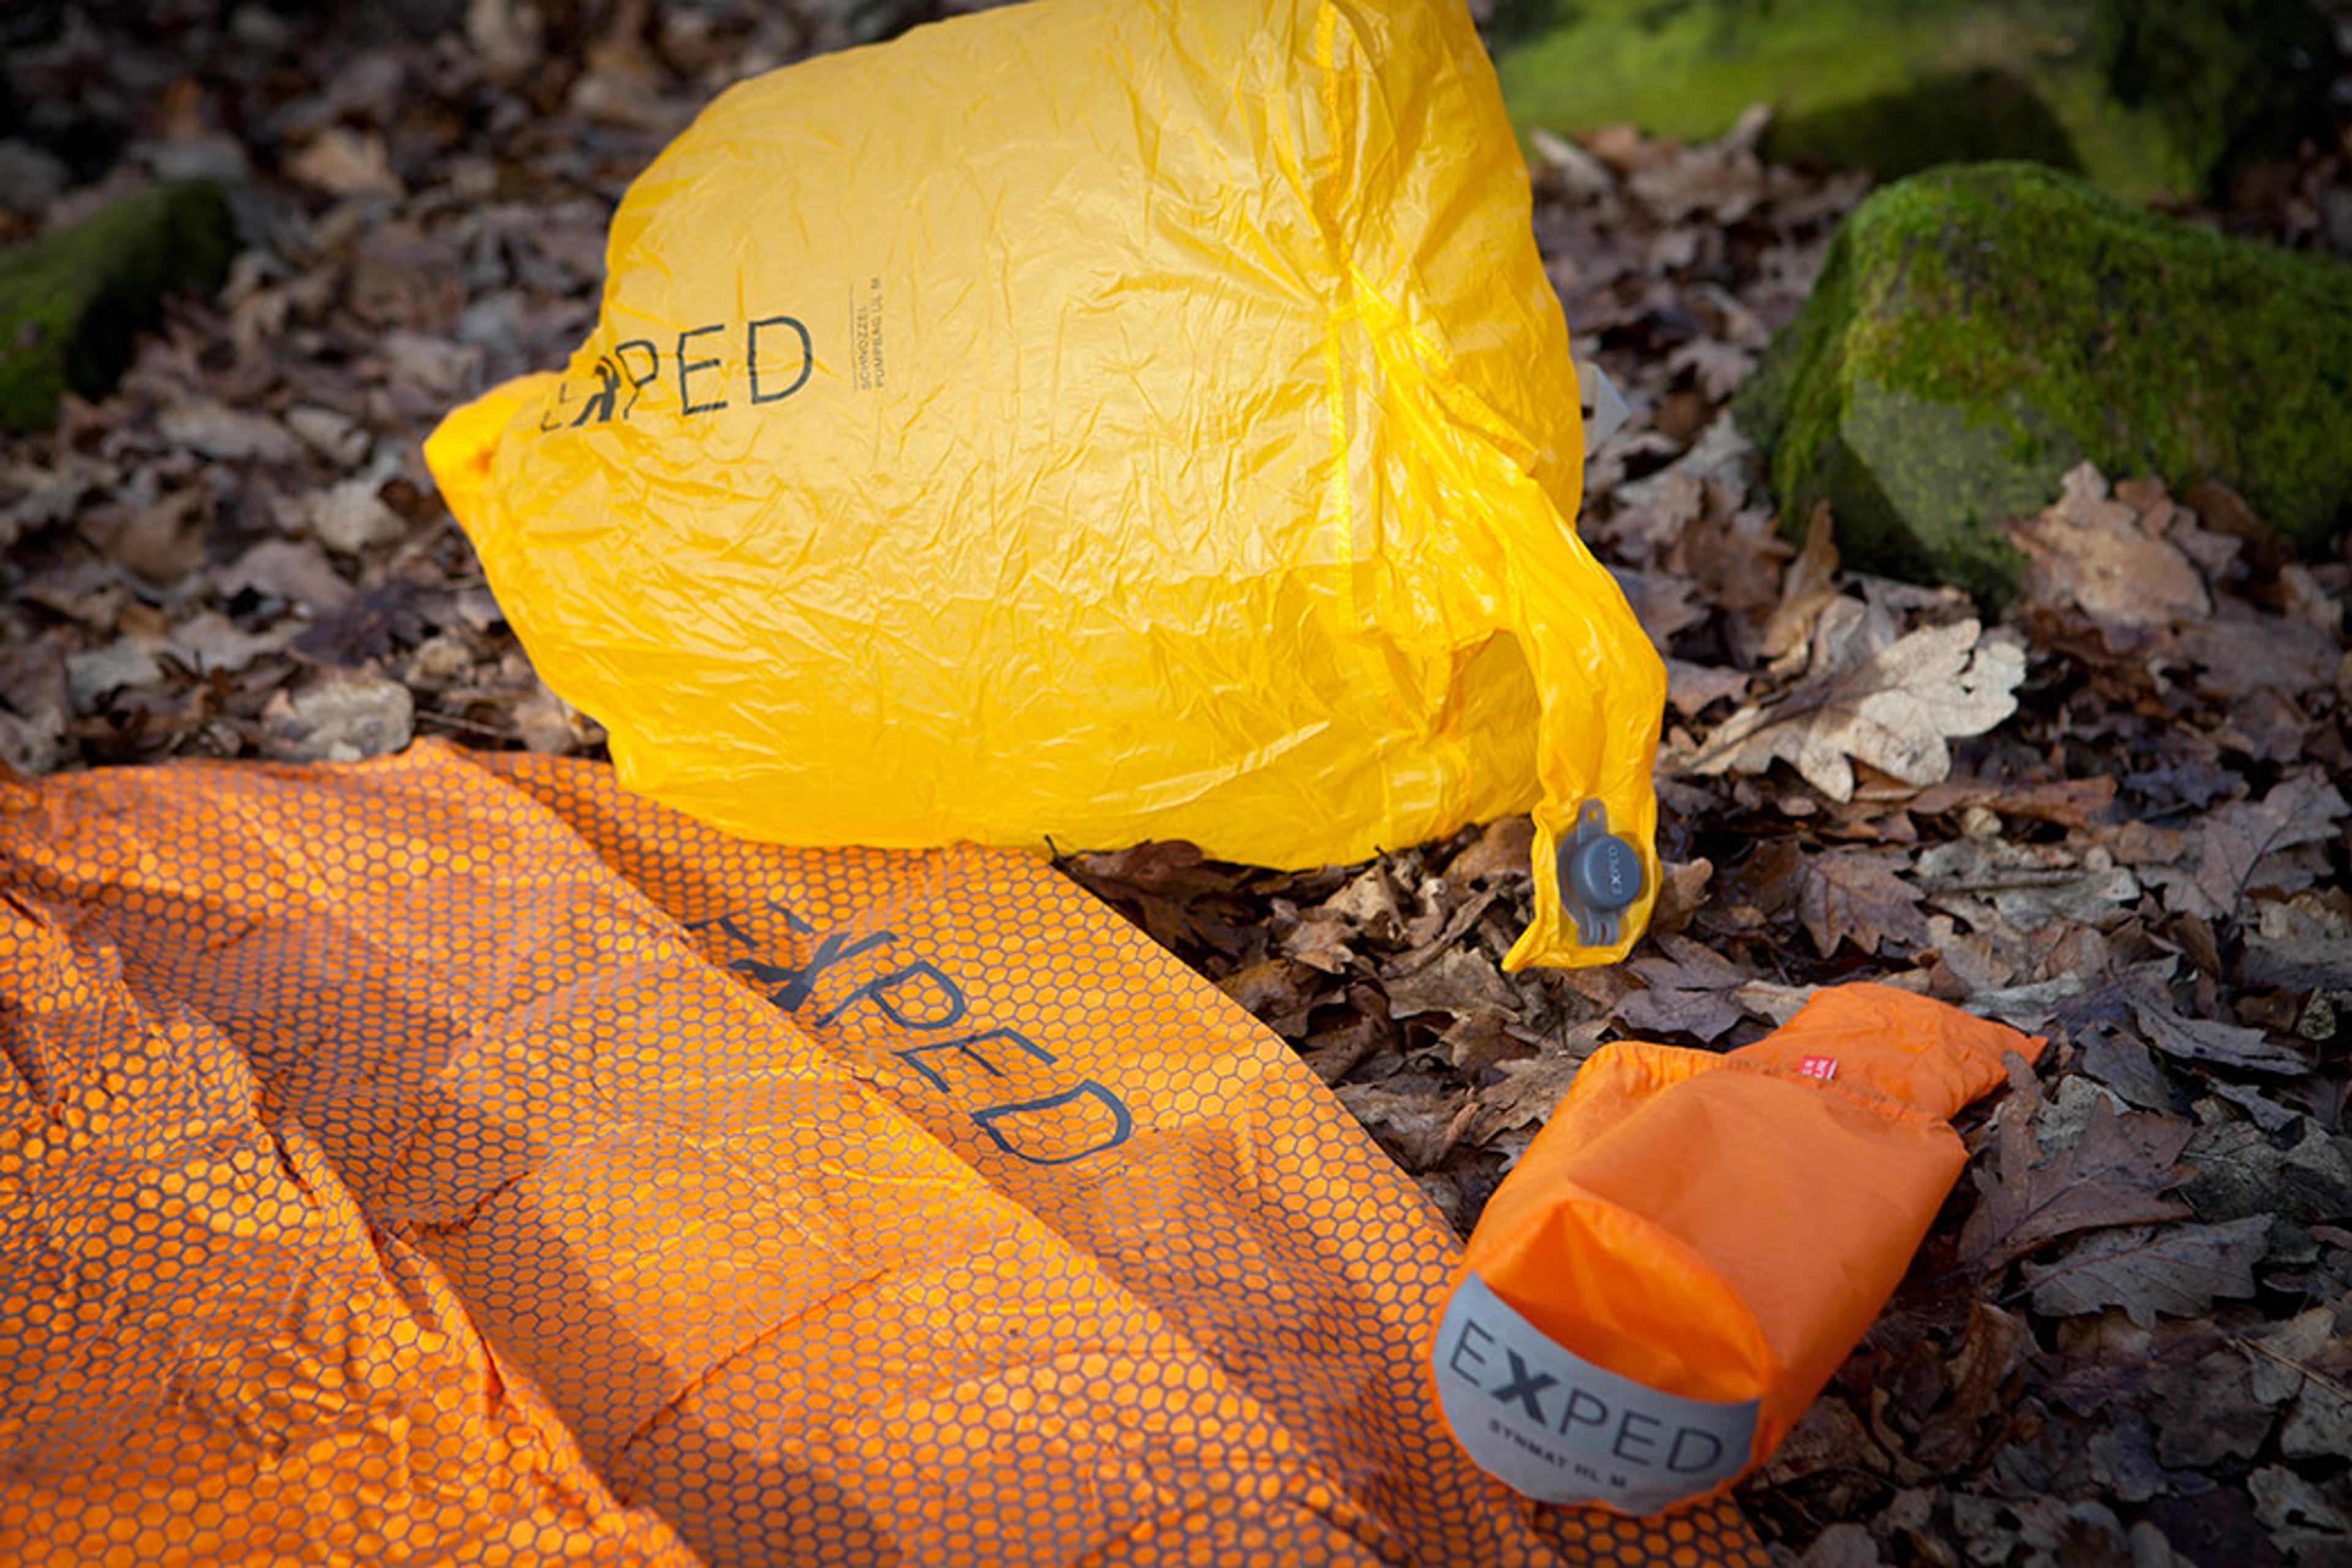
- Sleeping mat: don’t underestimate the amount of heat lost through the ground. A good sleeping mat will insulate you as well as add some comfort for weary bones. A new generation of inflatable mats with added insulation inside offer a great balance between warmth, pack size and weight. The SynMat UL LW from Exped is a good option for all seasons.
- Sleeping bag: all sleeping bags have a recommended temperature range – remember that you can boost this by wearing dry, insulating clothing (more on that in second). Also remember that the warmer the bag, the bulkier it will be. There are a few ways of saving weight for a given level of warmth, though. Down bags tend to be lighter and pack down better than their synthetic counterparts. A not so great feature of down is it quickly loses any insulating properties when it gets wet. It is possible to get down bags that have a water resisting treatment added, but at a cost. Synthetic insulation tends to be cheaper and warmer when damp, but a little bulkier and heavier. My favourite bag is the Rab Neutrino Endurance 200. It packs extremely small and is warm enough for me from Spring to Autumn.
- Clothing: The best sleeping bag is not going to work brilliantly well if you climb into it in wet and muddy riding gear. Merino leggings and a base-layer weigh next to nothing and will help you get toasty in no time. I also throw in a warm hat, buff, thin gloves and spare socks. An insulated jacket or vest adds a good boost to your sleeping bag’s warmth, as well as being handy for keeping cosy while moving around camp.
Three – Shelter
Shelter isn’t just about keeping the rain off. Wind, condensation and bugs can all spoil the comfort of an otherwise perfect sleeping spot. Let’s take another look at the options:
- Bothies and mountain huts: these are an amazing resource. Most are basic, but are more comfortable than sleeping outside, especially in bad weather.
- Bivvy bag: at the other end of the scale, a bivvy bag is essentially a waterproof bag for your sleeping bag to sit in. On a dry, clear night, nothing beats lying in the open air and staring directly up at the stars. Alpkit's Hunka is a well-priced basic bag which has served me well for years.
- Tarp: most bivvy bags have a wee flaw. That big hole your head sticks out of? It also lets rain in. Tarps have becoming increasingly popular amongst bikepackers. There are endless ways to pitch them, and can be adapted to the prevailing conditions. Personally, I don’t use them often, and as a result find pitching a bit of hassle. It is certainly well worth practicing in the back garden before trying to set up your tarp on the side of a mountain in a gale. Alpkit’s Rig 7 is checking out whether a tarp is for you.
- Tent: the old standby. Bulkier and heavier than a tarp, but in many conditions, adds a little more shelter. Tents can be a bit tricky to transport on the bike – especially the poles. The Terra Nova Lazer Comp is a good lightweight option which packs very small.
Four – Cooking
It goes without saying that if you are staying out all night, or for a few nights, you’ll need a bit of sustenance.
I don’t always take a stove with me when I bikepacking. If the route allows, I’ll try and make the most of pubs and cafes as I pass them, and save the weight. That isn’t always possible, and there is a huge psychological comfort to warm food immediately before bed and a brew before setting off in the morning. I use one of three stove options:
- All-in-one stove: Jetboil's (other brands have similar offerings) are a pretty hefty and bulky choice for bikepacking, but they heat water very quickly and efficiently. The heat they produce make them less good for anything other than boiling water though. Food tends to burn on the bottom too quickly.
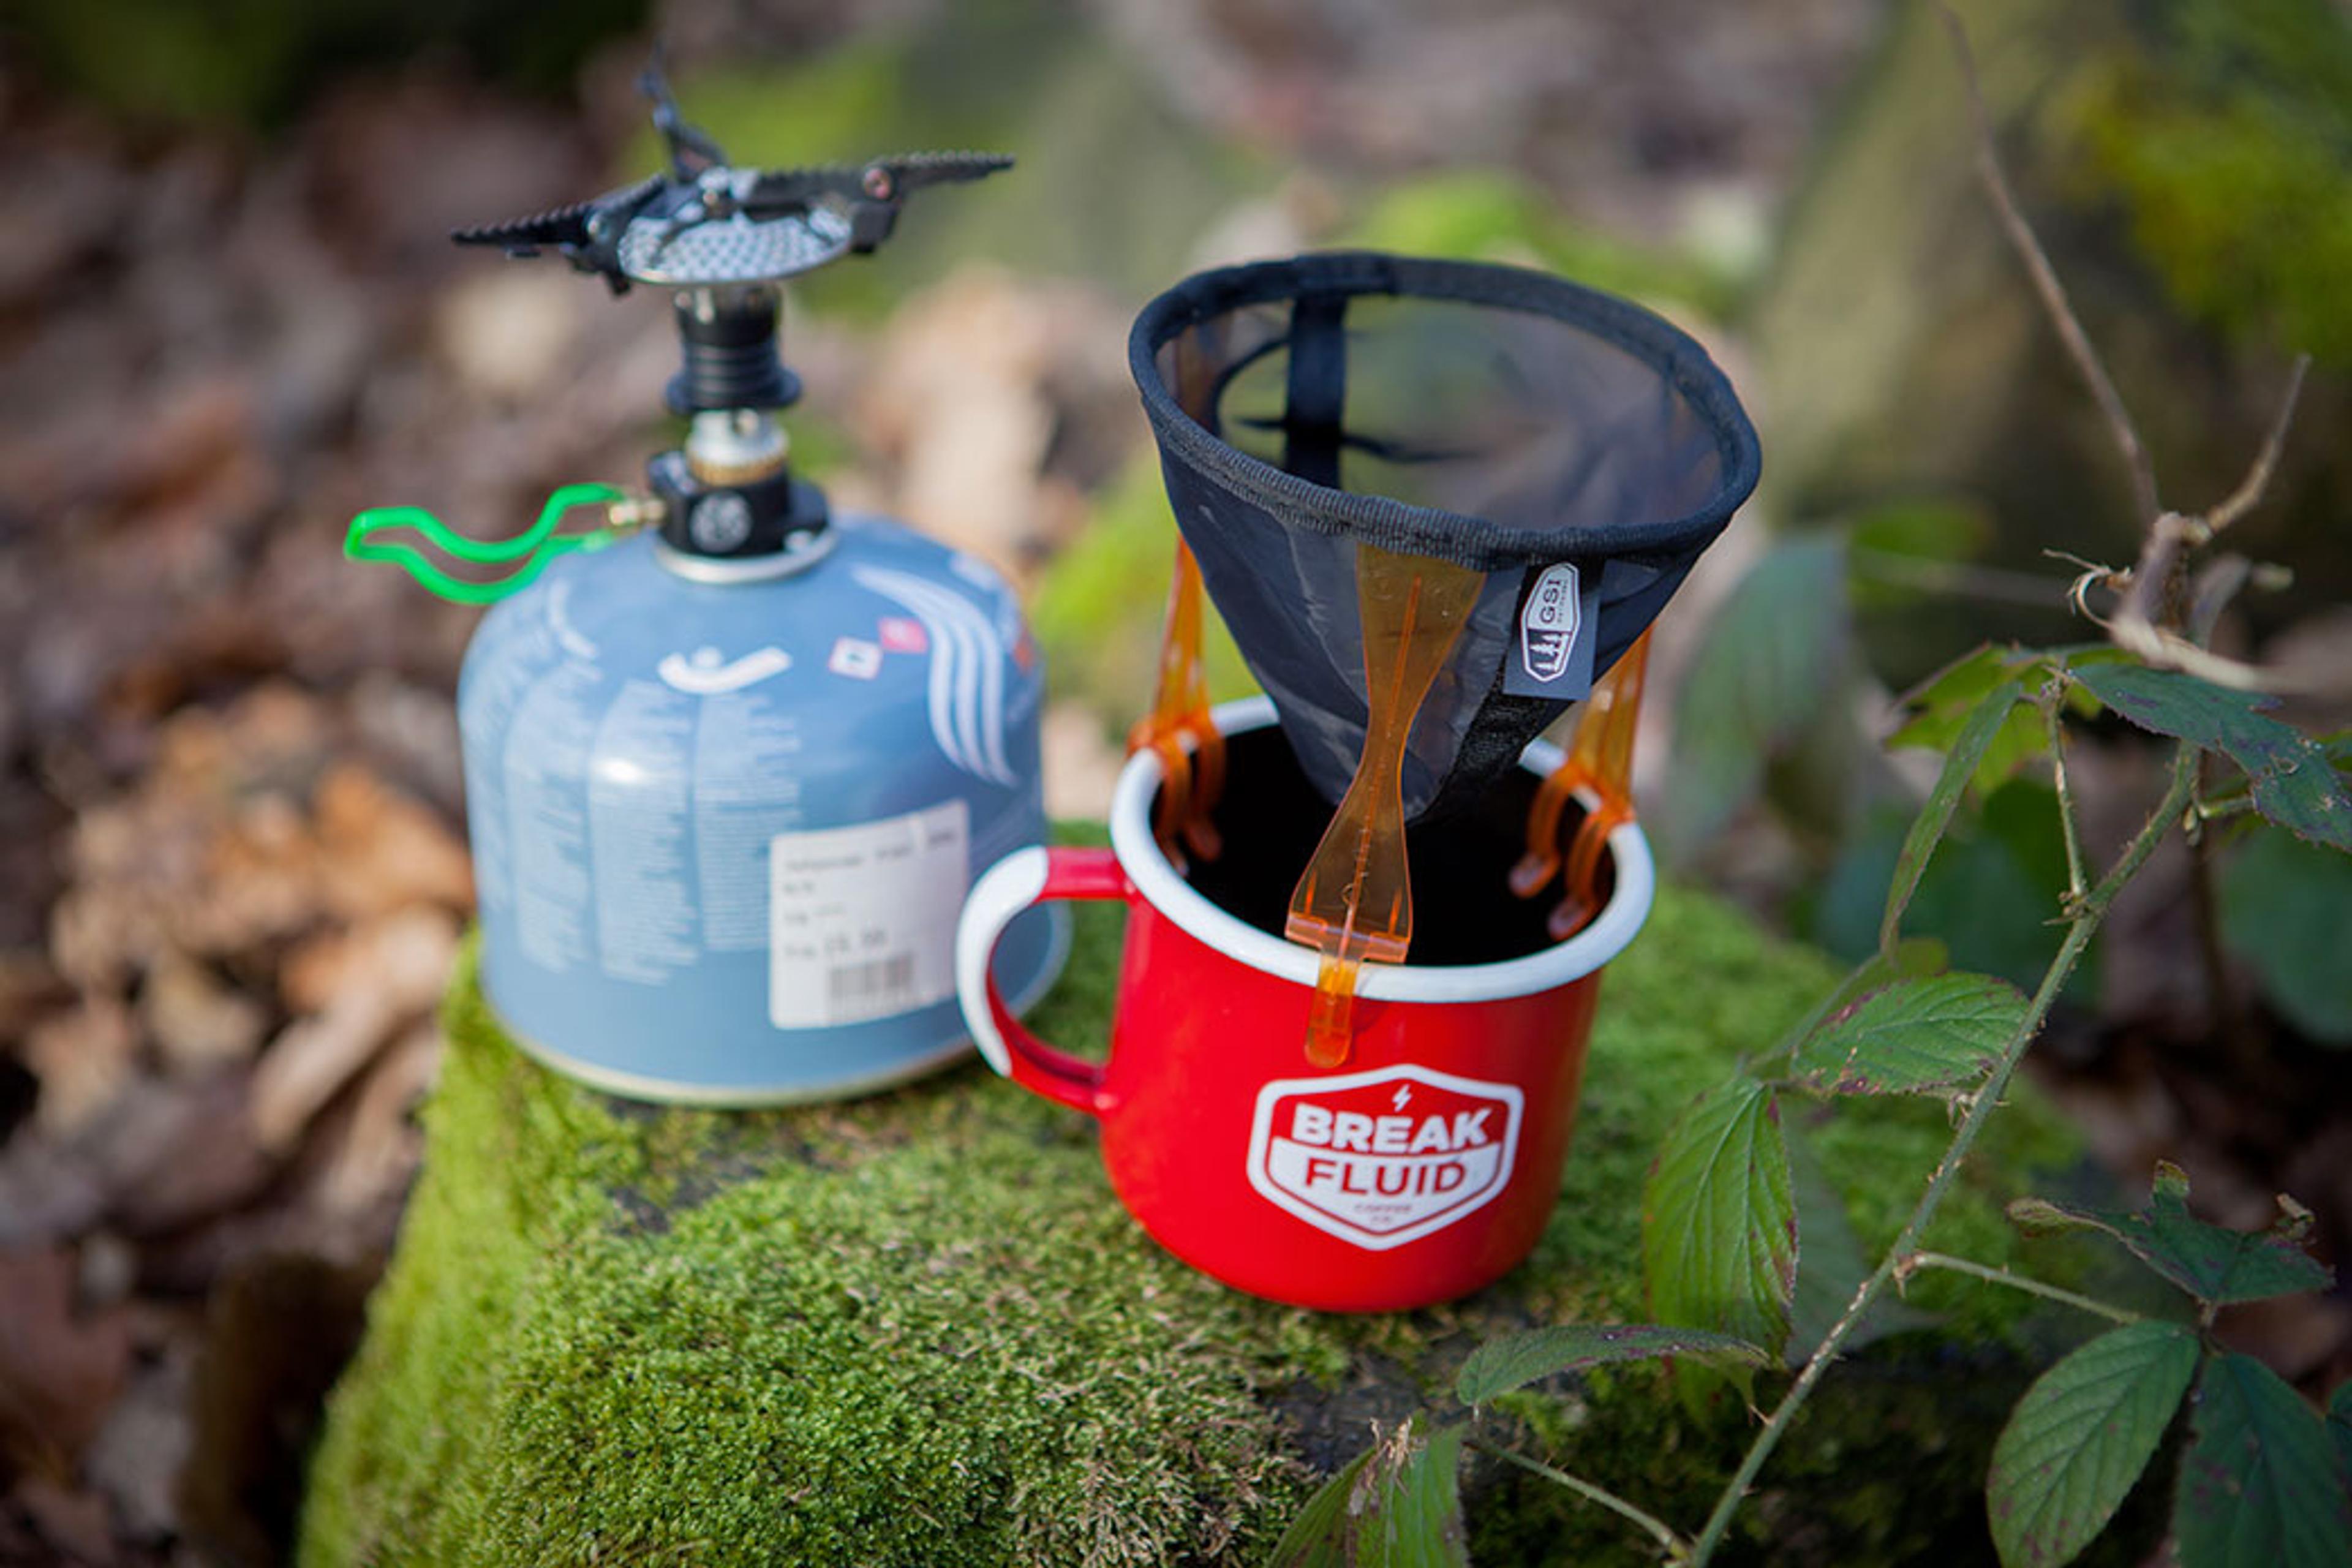
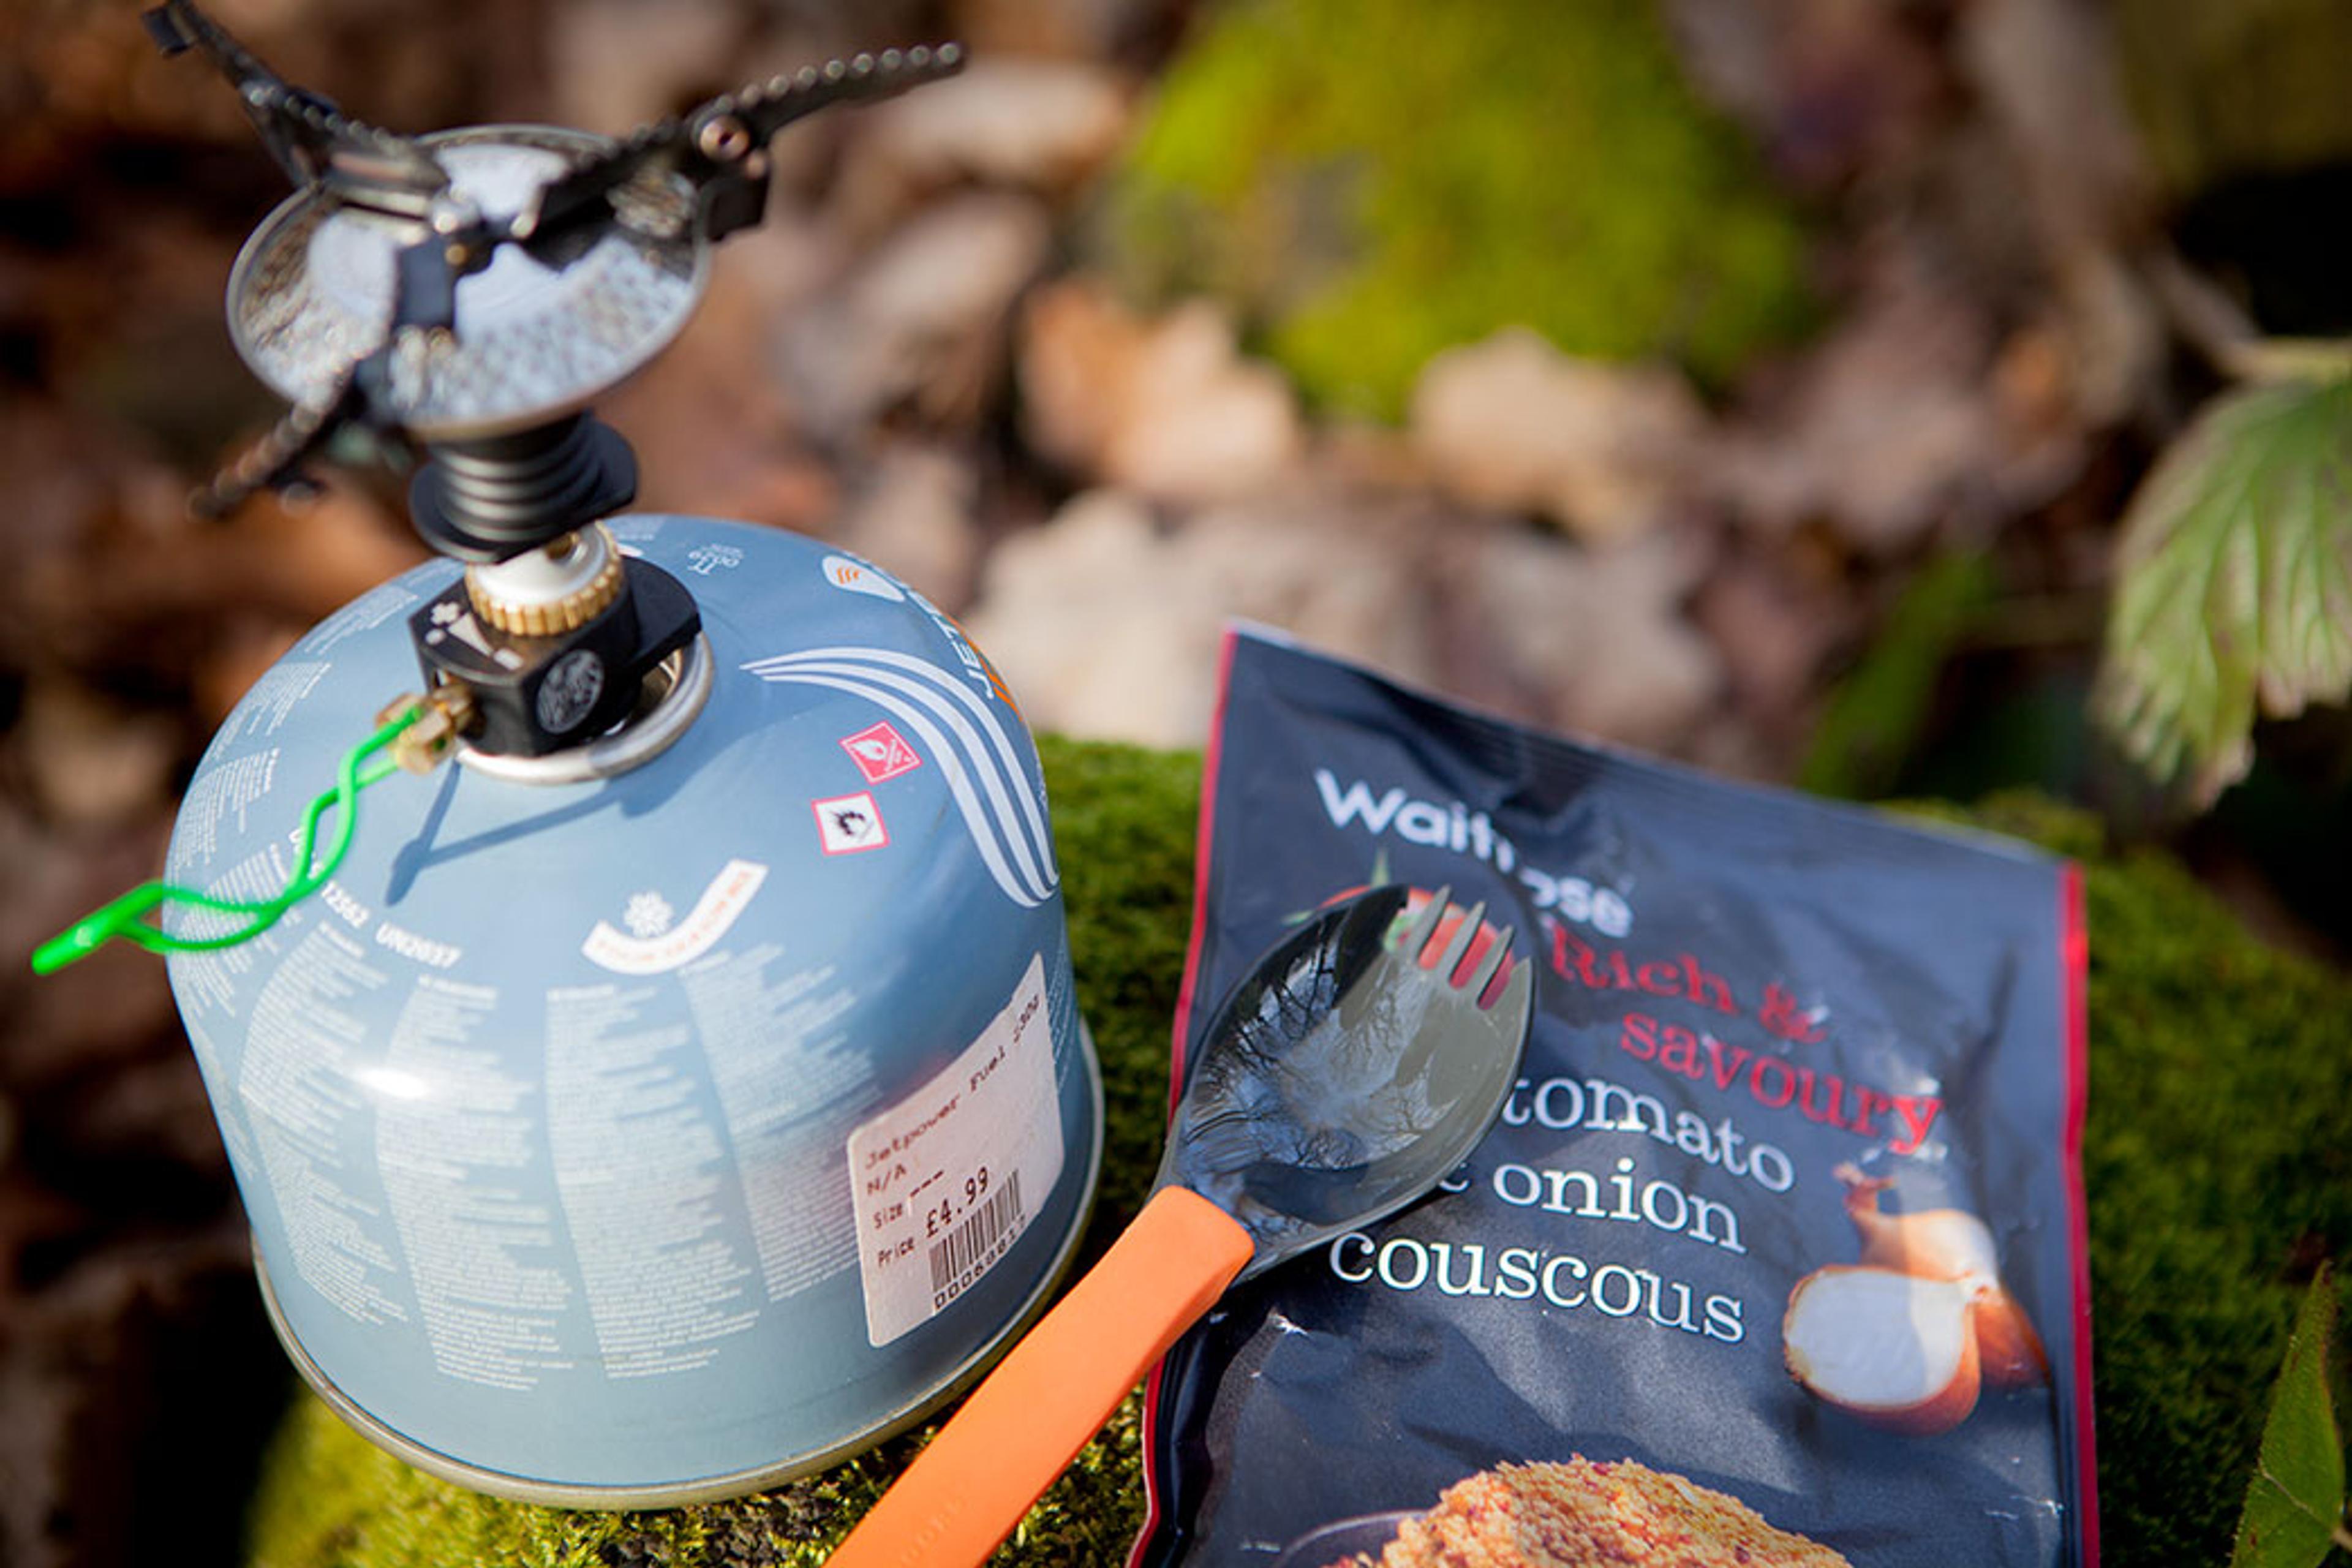
- Micro gas stove: My usual choice. A small gas can, tiny stove like the Optimus Crux, small pan/cup combo. Again, I usually only boil water, but there is greater flexibility to cook other food with this set up.
- Small meths stove: When travelling abroad, I sometimes bring a very small meths stove. I have friends who swear by them for everything. It is possible to create an incredibly light set up, and meths is readily available almost anywhere. I personally find them a little messy and a bit of a hassle.
- Regardless of stove option, don’t forget something to light it with. I have suffered the utter disappointment of arriving at my overnight spot, tired, thirsty and hungry… and realising my matches/lighter were still at home. Don’t be me.
Five – Food, all the food
Right, on to my favourite subject. We’ve a method of warming stuff up, what delights are we going to eat? There are a lot of dehydrated meal options in outdoors stores. Dehydrated meals are good in general, as water adds weight and bulk. I tend not to buy the ready-made options though, as they are pretty expensive. My usual stand-by is cous-cous – either pre-flavoured sachets, or plain with a stock-cube crushed and added to the mix. Cous-cous is my favourite form of carbs to use, simply because it doesn’t actually need cooking. You can add hot water and leave it to stand for a few mins and hey presto. I’ve even made it with cold water before (see above). I add a few things to this - chunks of parmesan, chorizo, nuts, raisins… whatever takes your fancy. I’ll also usually bring a bar of chocolate for dessert. It is, of course possible to be way more creative with your camp cooking. I’ve friends who have made everything from pizzas through to curries on their camp stoves. Finally, I’m partial to a wee tipple to finish off a long day in the saddle. A hipflask of whisky always makes its way into my framebag.
Six – Is that all?
And here’s a bonus sixth tip. There’s a heap of other things that you may or may not take on a normal ride that it’s good to bring along with you when bikepacking – as a rule you will probably be going further afield and away from civilisation for longer, so it is worth making sure you are as self-sufficient as possible. A good repair kit is a must, as is a means of navigation (including spare batteries if you are using a GPS). Even if you aren’t planning on riding into darkness, it is worth having a headtorch for walking around camp at the very least. I’d also recommend having some “be seen” lights on the bike too. Remember if you are out all day, you’ll probably need a little more riding food than normal and make a note of any possible resupply stops on the way (and when you will likely arrive – a village shop probably won’t be open at 11pm on a Sunday – maybe not even 11am on a Sunday).
If I’ve not mentioned it here, you probably don’t need to bring it. I don’t carry spare padded shorts – I’d rather pull on a damp pair the next day than carry a damp pair and get a second set soggy within minutes of setting off riding. A penknife is definitely handy to have, but I’ve rarely absolutely needed to use one. Equally, I’ve ridden into bothies with logs for the stove, a bag of wine and all the ingredients for a three course meal. It was a slow pedal, but a fun night.
Finally, don’t worry if you haven’t got everything on this list. Can you borrow some kit from a friend? Maybe do away with the cooking kit, and eat at a pub before you leave. Start with a rucksack and buy framebags as you can afford them. Dip a toe in the water and see how it goes.
As always, just get out there, have fun, share your stories.
Your quick checklist:
The bike
- Luggage
- Spares and repairs
- GPS (if used)
- Lights (if used)
You
- Riding wear appropriate for the conditions
- Change of clothes for camp
- Extra waterproof/warm layers
Sleeping
- Sleeping bag
- Sleeping mat
- Bivvy bag/tent/tarp
Cooking and food
- Stove
- Lighter/matches
- Fuel
- Pan/mug
- Camp food
- Riding food to see you through to resupply
- Water bottle(s)/Camelbak
Other stuff
- Map and compass
- Small toothbrush/toothpaste
- Toilet paper in a ziplock bag
Join now for engaging stories, exclusive offers and product news delivered right to your inbox.